Announcing support for Amazon VPC
Navigation
- Create a VPC
- Connect a new environment to a VPC
- Connect an existing environment to a VPC
- ELB Caveats
Back in 2009 AWS introduced VPC (Virtual Private Cloud) which allowed AWS resources to be provisioned in a more granular way. For example, you could choose the private IP address to associate with a particular instance through a network interface.
Engine Yard Cloud was, unfortunately, tightly coupled to the old way of doing things (EC2-Classic in AWS terminology). Sometime around 2011/2012, AWS started creating new accounts (or new regions) with a default VPC, and all but discontinued development of EC2-Classic at that time. They did, however, provide a compatiblity interface to allow existing workflows to remain intact while still allowing access to the niceties of VPC. Since that time, these “Default VPC” regions and the EC2 Classic compatibility layer were the only way we supported the concept of VPC.
Engine Yard has a large number of AWS accounts that are old enough to not have a default VPC. These customers have not been able to utilize new features, such as current generation instances, as there has been no support for custom VPCs in the Engine Yard platform up until now.
Utilizing VPC and ClassicLink, customers now have the ability to provision a VPC and add new instances to environments while maintaining all of their existing infrastructure. The rest of this post will outline how to get started with a VPC
Create a VPC
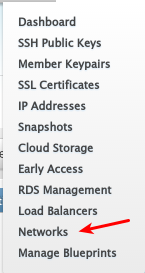
You’ll find a link to the Networks management page under the Tools dropdown on your dashboard
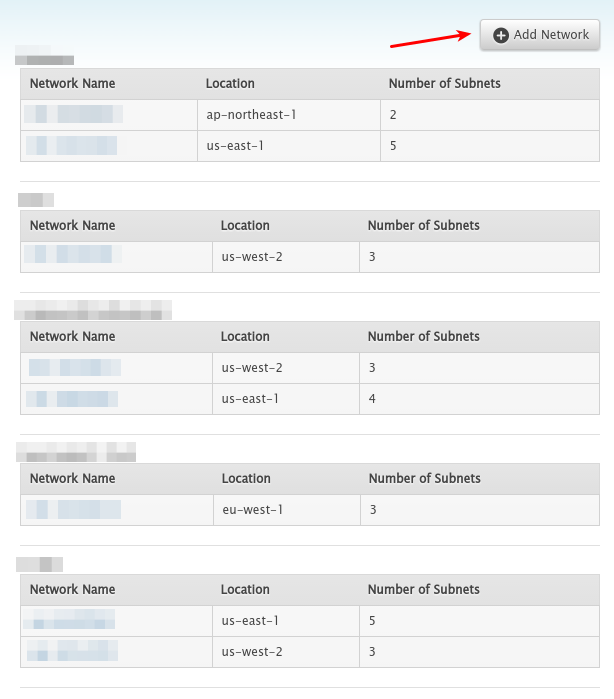
On that page, click Add Network
You’ll be greeted with the following form
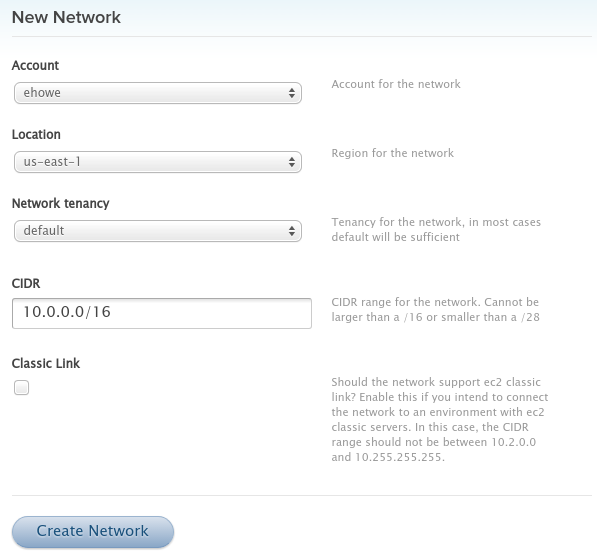
- Select the appropriate account if you have more than 1
- Make sure the region matches the region of the environment(s) you plan to connect to the VPC.
- The CIDR will need to be in the 10.0.0.0/16, 10.0.1.0/16, 172.16.0.0/12, or 192.168.0.0/16 range so as to not clash with the EC2 Classic IP space. Note that your CIDR cannot be larger than a /16.
- Check the ClassicLink box if you intend to connect this VPC to an existing environment in the EC2 Classic space
When you click create, you’ll be taken back to the networks listing. Refresh this page after a few minutes, and you should see the new network listed. If you click on the VPC ID, you can see more information about the VPC you just provisioned
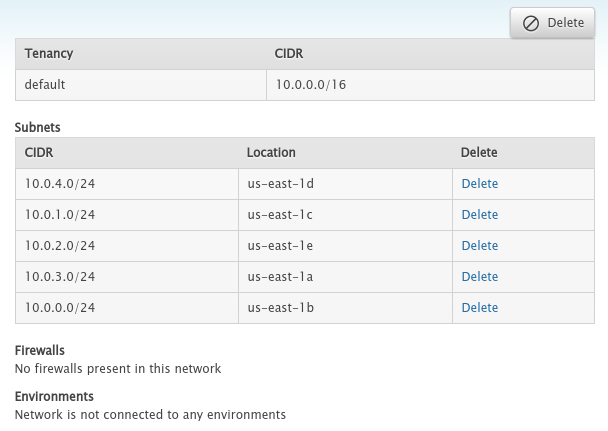
By default, we create a /24 for each availability zone that an account has access to. In this case, it happens to be all 5 availability zones in us-east-1.
Connect the VPC to an environment
Connect the VPC to a new environment
If you don’t want to utilize ClassicLink with an existing environment, go ahead and create a new environment. On the form, make sure to select the network from the dropdown

On the boot environment screen, you’ll have access to current generation instances. You should be all set at this point.
Connect the VPC to an existing environment
If you navigate back to your environment, and click edit, we can now select the network you just created. This field will only show you networks in your environment’s region.

As the field help says, once you click Update Environment, your instances will be connected to the VPC. A new firewall will be provisioned for your environment (leaving the old one intact for as long as there are ec2 classic servers in your environment). You’ll see your environment go through the following states
First the VPC ID will appear, the firewall will “disappear”, don’t worry it’s not really gone, and a new one will start provisioning.

Second, you will see the new firweall id

Third, the environment will revert to a normal looking state with the VPC ID showing permanently as a reminder that this environment is connected to a VPC.

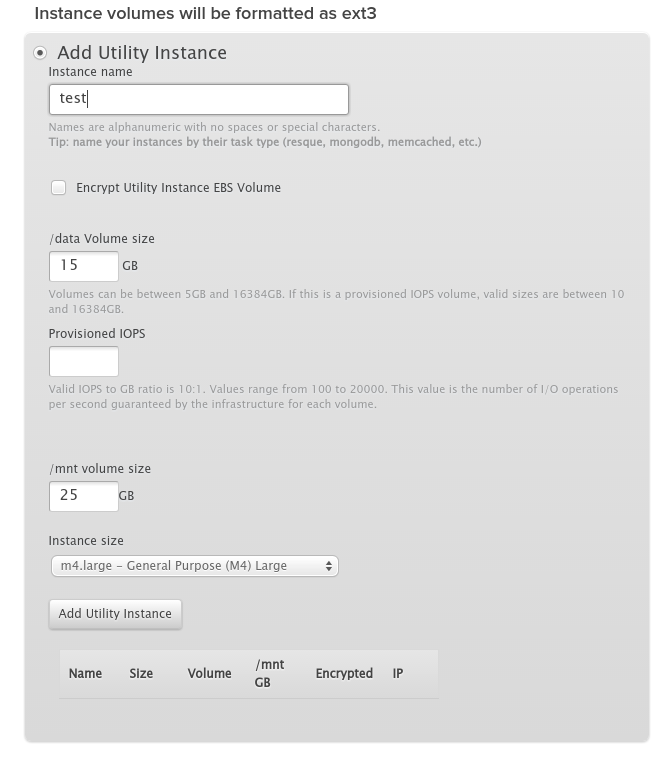
On the Add instances page, you’ll see you now have access to current generation instances.
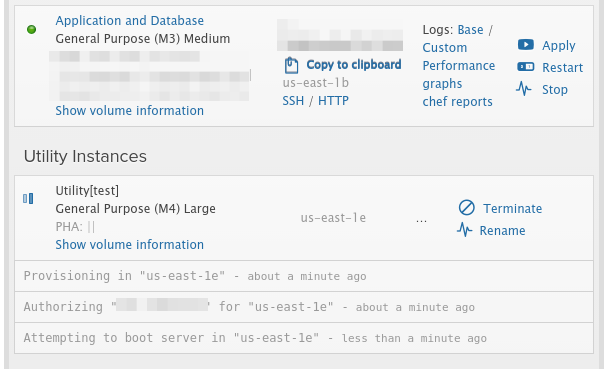
You’ll see the current generation instance booting along side the previous generation instance
Caveats
ELBs
Due to AWS limitations, a new ELB will be required if you opt to connect previous generation instances to a VPC using ClassicLink. An ELB must be created in a VPC in order to have VPC instances. However, an ELB created in a VPC can have ClassicLink instances connected to it.
You will need to create a new ELB, and choose to associate it to the environment so that the ELB is created with the environment’s VPC firewall.
Once the ELB finishes creating, your ClassicLink enabled instances will be part of the load balancer.
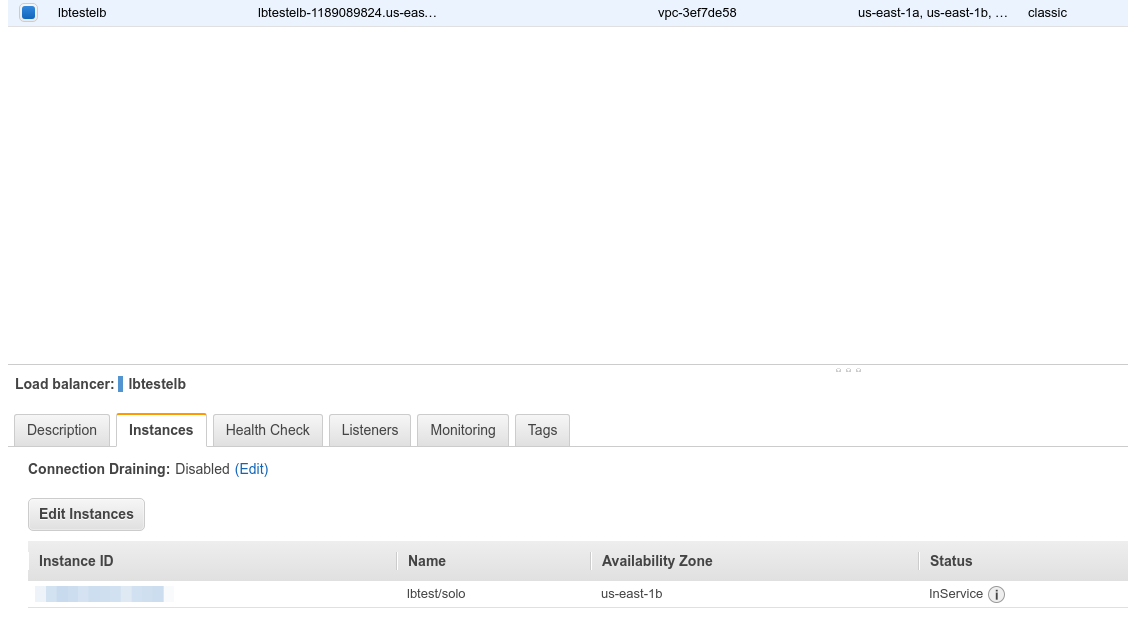
As you can see, the ELB is part of the VPC, and the instance connected is the solo instance from the screenshot above.
Once you finish creating this ELB, this would be a great time to change DNS. Once DNS propagation has finished (plan 24 hours or longer, depending on the TTL of the domain pointing to the ELB), you can start adding additional infrastructure inside the VPC. This way, you minimize costs of running extra servers during the time you are waiting for DNS propagation.


