Middleman: Static Sites Aren’t Just for Blogs
When working on a new language, framework, or toolset, we’re often working with an example that wants us to build a blog. While blogs are great and easy to build, they are a limited in scope, and it could be we’re looking to build a different sort of static site—one that isn’t a collection of posts arranged by date. So what’s the alternative?
Enter Middleman.
Middleman is a framework built for the purpose of creating simple static sites. Think of it as Jekyll, but for everything that isn’t a blog. And in this post, we’ll look at creating a simple static site with Middleman. This example was built using Ruby version 2.1.1p76.
Installation and Setup
Let’s start by installing the Middleman gem:
$ gem install middleman
Middleman has a few dependencies, so this might take a few moments depending on your connection speed. Once this is done, you can create (or initiate) your project. We’re going to create a project called ruby_karaoke, so we run this command:
$ middleman init ruby_karaoke
This creates an initial set of ruby_karaoke project files, and kicks off Bundler.
Bundler is a Ruby gem and dependency manager, and an important component of modern Ruby projects. As such, it is not installed automatically with Middleman. Be sure to have Bundler installed prior to running the init command.
After running the init command, your screen should look something like this:
$ middleman init ruby_karaoke
create  ruby_karaoke/Gemfile

Fetching gem metadata from [https://rubygems.org/](https://rubygems.org/).........
Fetching additional metadata from [https://rubygems.org/](https://rubygems.org/)..
Resolving dependencies…
Using i18n 0.7.0
Using json 1.8.2
...
create  ruby_karaoke/source/javascripts/all.js
create  ruby_karaoke/source/images
create  ruby_karaoke/source/images/background.png
create  ruby_karaoke/source/images/middleman.png
The project has been created.
Change into the ruby_karaoke directory, and run:
$ middleman server
This runs a development server so you can test your site locally. Visit http://localhost:4567 in your browser, and you should see something like this:

Cool, everything worked!
Now comes the fun part. Editing the site and making it our own.
Customization
Under your project directory, you have a source directory. This contains the source of your website, i.e. files that Middleman uses to build a static version your site.
Let’s start by editing the source/index.html.erb file, which is responsible for displaying the index page at the root of our site.
Here’s what the start of ours looks like:
---
title: Welcome to Ruby Karaoke
---

<div class="welcome">
  <p class="doc">
    <h1 align = "center">About</h1>
	Ruby Karaoke (#rubykaraoke) is a labor to bring the community together behind the microphone.  What better way to make friends and to break the ice at a conference then by singing a few songs with some people, free of judgement?  Ruby Karaoke strives to keep things fun, light, and inclusive!  Everyone is welcome to take the stage or to stay in the crowd and cheer on old friends and new.
Since I used the <h1> tag, and that includes the Middleman logo by default, I decided to add my own image and use that as a header instead.
First, I created the source/images/banner1.jpg file, then I opened the source/stylesheets/all.css file and added this to the h1 class:
background: url("../images/banner1.jpg") no-repeat center 100px;
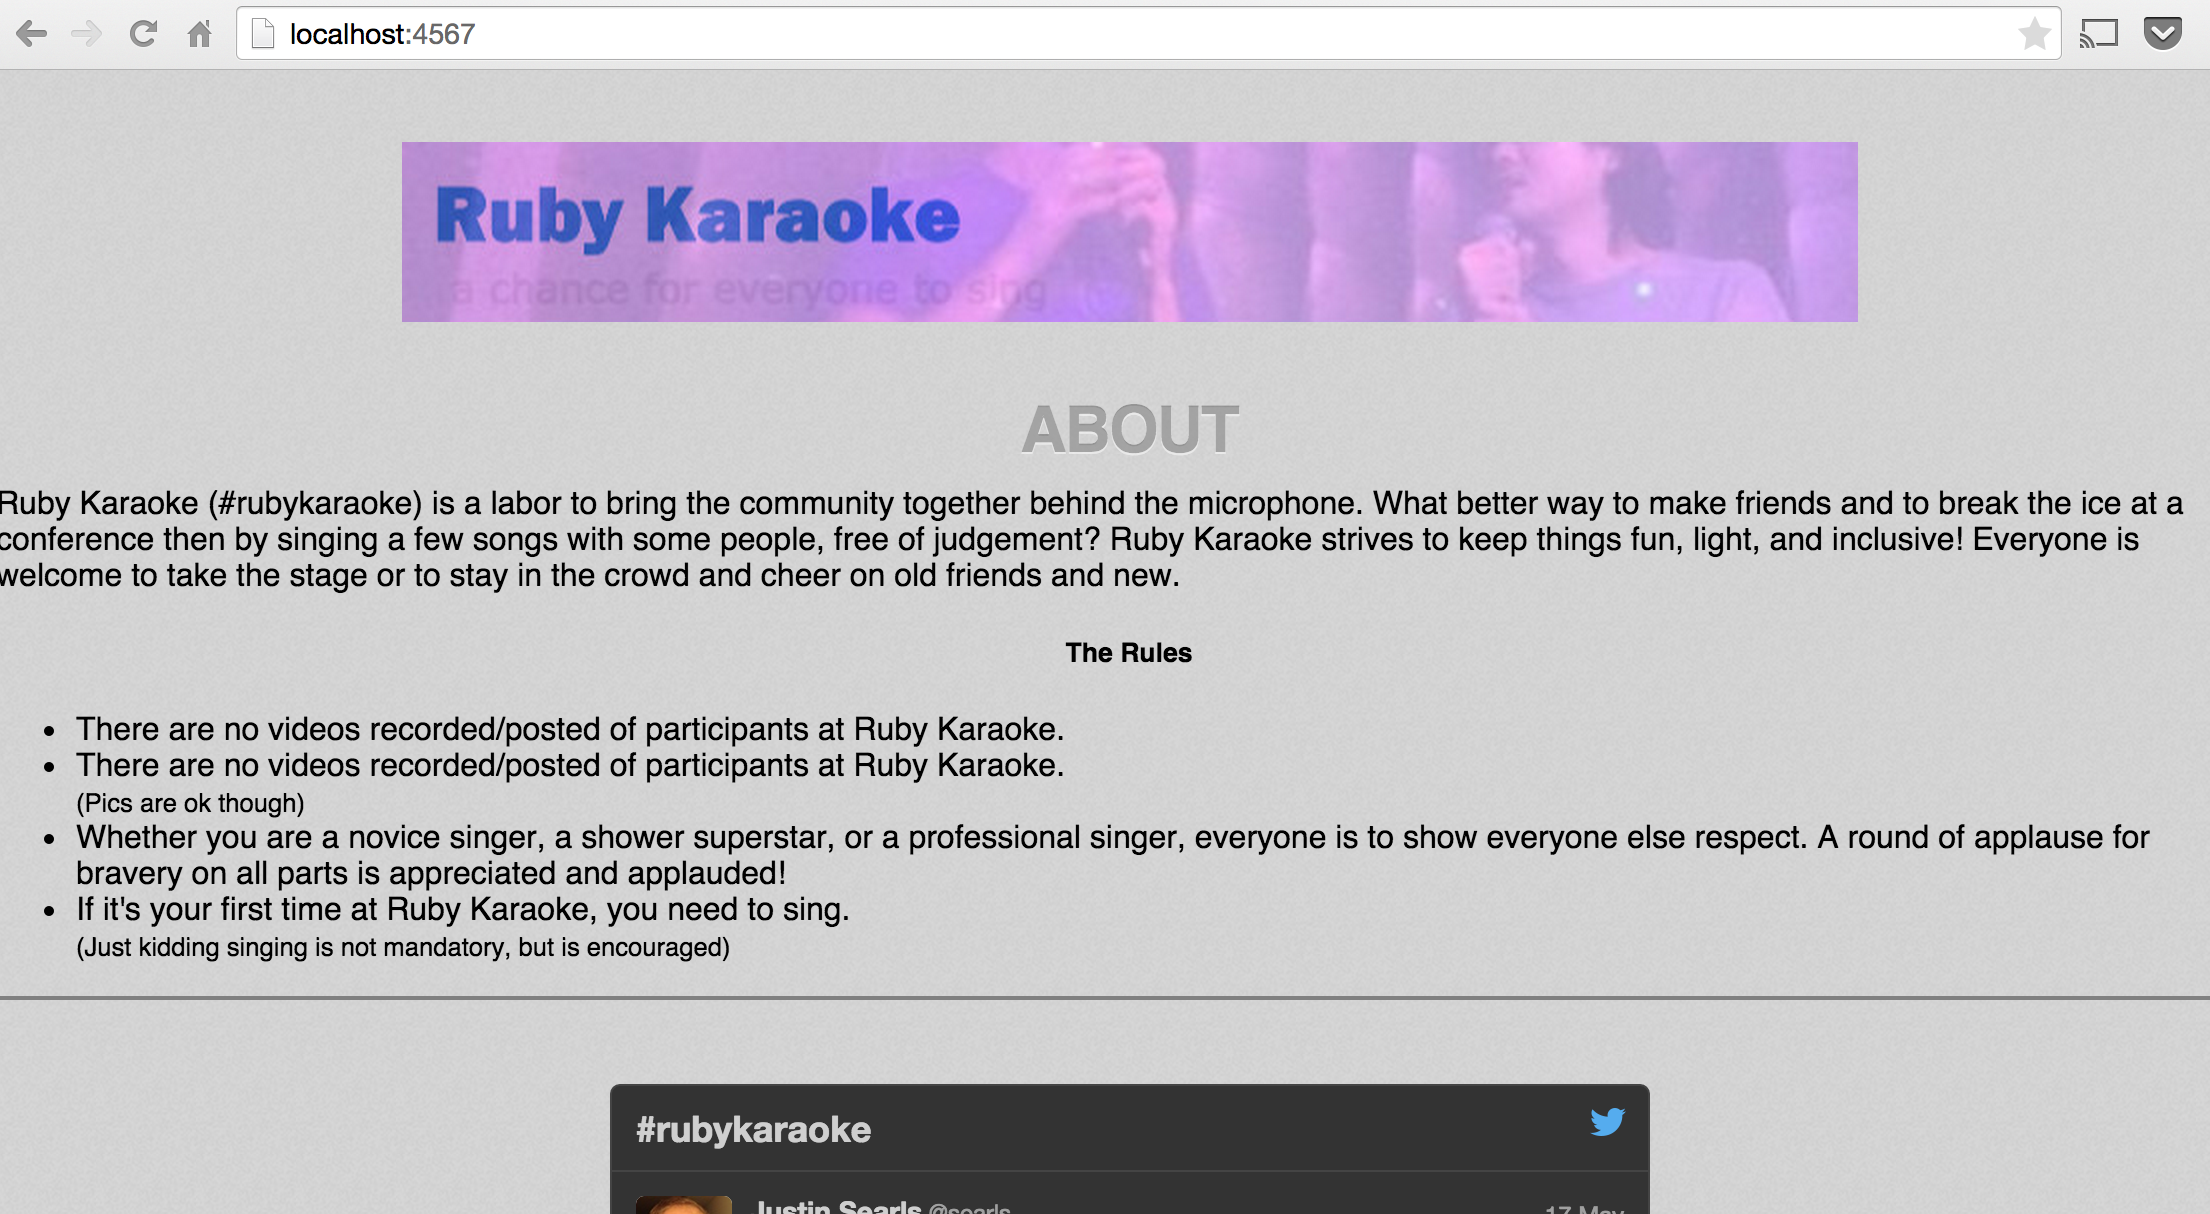
Now my index page looks like this:

But Middleman is about way more than just simple HTML and CSS. You may remember trying to maintain an HTML website by hand. If you decide to change the footer, you would need to go through every single page making the same edit.
Thankfully, this is what Middleman was built to address.
If you look through the documentation you’ll find many tools at your disposal. You can make use of templates, layouts, partials, variables, along with more advanced stuff, like localization. These really help when you’re putting together a large static site.
Getting back to our example, let’s use Middleman to add a dynamic footer. One that only needs to updated in one place, in case of making changes later.
First, create a file called source/_footer.erb. Note the preceding underscore on the file name. This indicates the file is a partial, and can be re-used (i.e. included) in other pages. It also let’s Middleman know not to serve this file as a stand-alone page to our end-users.
Once this is in place, add some content:
<footer>
    Copyright <%= Time.now.year %> <br />
</footer>
Note the use of <%= something %> here. This allows us to eval (Ruby) code and replace the output into the document—a standard templating technique. For more on the use of this syntax, check out the Ruby syntax documentation.
We’ve added a copyright notice using Ruby’s Time.now function to display the current year. We wrap it in the <footer> element so we can style this up with CSS.
Open source/index.html.erb and replace the existing footer with:
<%= partial "footer" >
Tada! We just included another file.
Our index page has copyright notice which updates every time we build our site. And now, for every page we want to include this footer, we can add the same line. No need to edit the footer on every page when we want to make an update.
This is a simple example. Of course, there’s more you can do. The only constraint with a static site is that the processing happens offline, once, before we deploy. After deployment, the site remains static, hence the name.
One additional advantage to this approach is that static files can be served up lightning fast, because we don’t have to generate them for each new visitor.
Deploying
So how exactly do we build and deploy? Well, I’m glad you asked.
Run this command:
$ middleman build
When this runs, the template files get compiled, executing any of the logic you’ve included in them. This produces a separate set of static files located in the build directory, at the same level as your source directory. It is these files that we serve up.
You can run this command as many times as you want. The output files will be replaced each time, so make sure not to edit them directly!
Add the build directory to Git, commit, and push.
We have to do one more thing to get this working on Engine Yard: tell the Passenger webserver how to serve these files up.
To do that, create a config.ru file, and add:
require 'middleman-core/load_paths'
::Middleman.setup_load_paths

require 'middleman-core'
require 'middleman-core/application'
server = ::Middleman::Application.server
run server
This file uses Middleman as a middleware component and will configure Passenger to serve up the static files in your build directory.
That’s it. Commit your changes, push, and deploy to Engine Yard. If everything worked correctly, you have your first live Middleman powered static site!
For reference, check out the final application on Github or look at the live version.
Conclusion
Middleman is an easy way to build simple static sites with Ruby.
You get the all the performance benefits of static files, with the power and familiarity that comes with Ruby and common templating tools. This is a powerful combination, whether you’re using this for a website with one page, or hundreds of pages.
P.S. What do you think? Would you try this? Do you have a alternative static site generator you think we should cover in a future post? Leave a comment!


Share your thoughts with @engineyard on Twitter
OR
Talk about it on reddit